the A.R.M. Terminal

My concept for this project has been pretty clear since the original idea. I love the movie The Matrix, and I often wonder about many movies like it if they had included 3D printing or other newer tech in their universe. I loved the look and idea of a floating terminal, and many of us already have monitors on arms instead of just sitting on our desk. So why not a arm-mounted cyberdeck? That’s what this project is, and I’m calling it the ARM Terminal.
I wanted a modular Raspberry Pi enclosure that can handle a screen, but on a frame that can replace parts as the accessories change. As the Raspberry Pi form factor has evolved over the years, many times a existing enclosure or case can’t be reused with newer models. At the end of the article you can get the parts list including the design files, or purchase a set of the 3D printed parts from my store here.
The key ideas for the project were:
Reusable
Make the parts reusable. I often scrap half finished projects, and many times old parts can’t be reused. I thought it would be cool to make some parts generic enough that they could see use after this project is done with them.
Hackable
I want the parts to be easy to modify- whether that’s a design that’s easy to change in Tinkercad, or easy to zip tie or modify later. This goal also means that it’s easy to work on- and I wanted to make a project as easy as possible for people who want to recreate it.
Modular
The parts need to be modular- I really want to be able to replace or upgrade certain parts without redesigning the whole thing. This makes the project bigger, but it also makes it a little easier to work on.
Side Panels
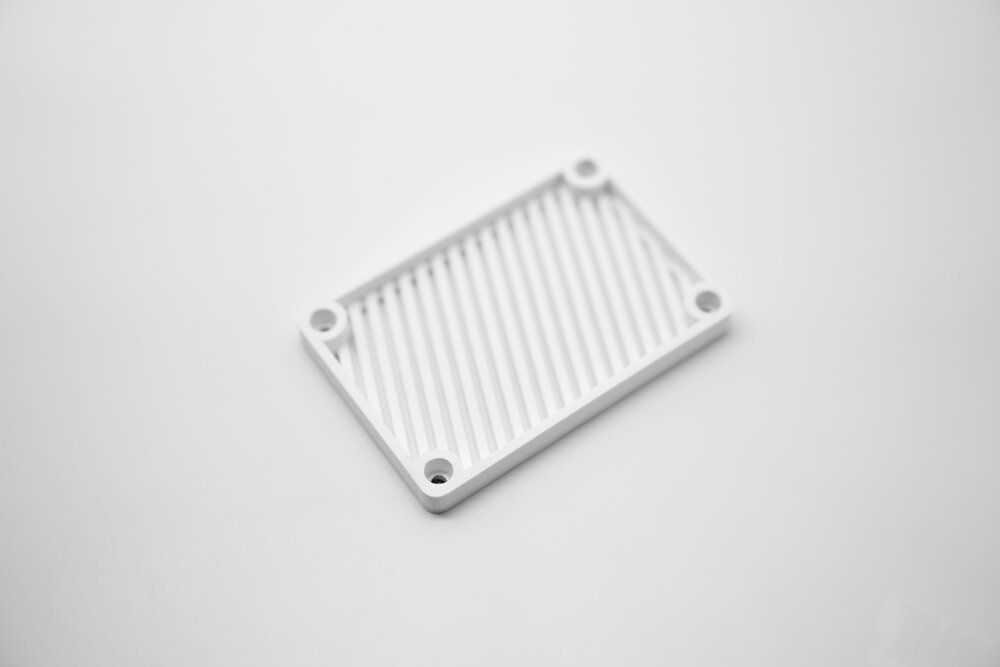
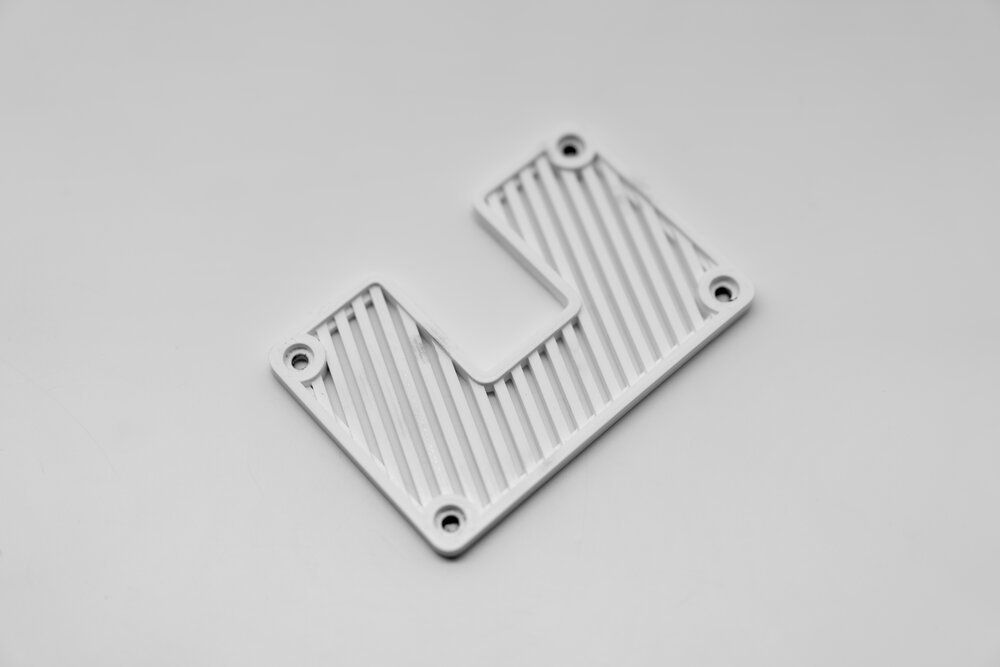
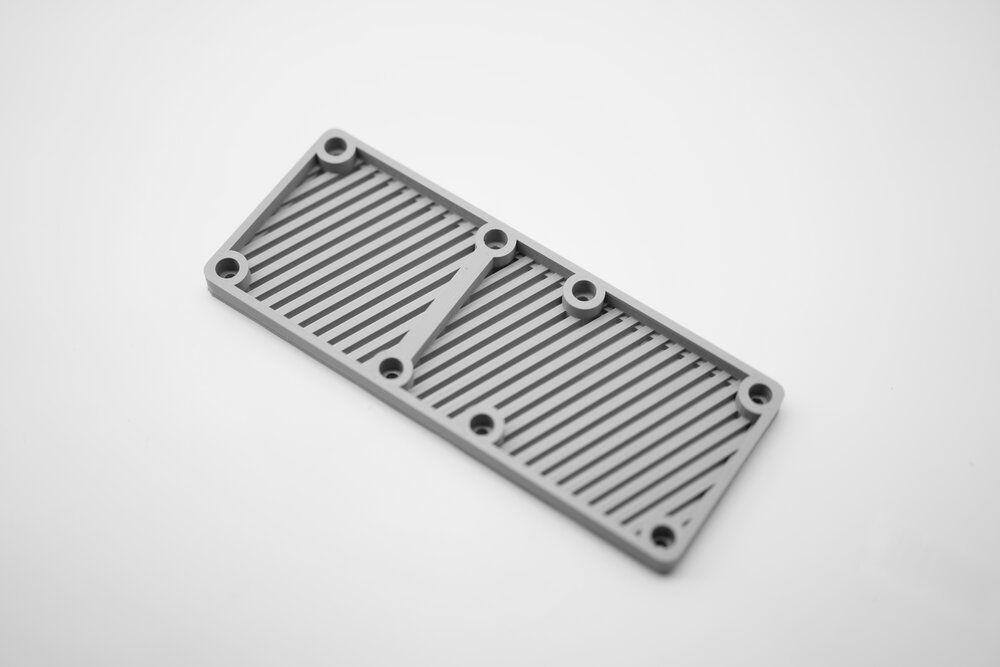
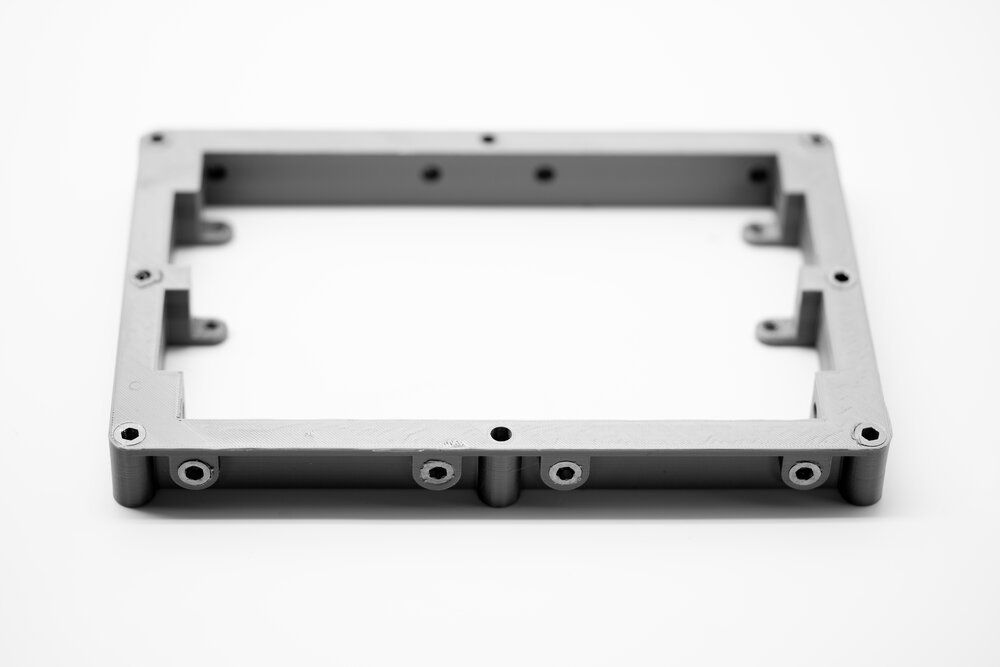
A big part of the modular design is that the ARM Terminal is assembled similar to a cube- a single side can be removed without sacrificing too much structural integrity. This means that each side panel needed to be stiff. The early prototype was just the outside frame of the white part below, and it looked a little too boring. I added the striped vents, and I am really happy with out it came out. I quickly found that the standard side panel didn’t allow for easy routing of wires, so I made a version with a big channel in it. This part is still pretty rigid too. The top panel needed to be pretty strong, so it’s the largest and thickest of the side and top/bottom panels. If you compare it to the others, the frame is raised up quite a bit more here- that could easily be made thinner to save on plastic. It could also easily be made thicker and have additional mounts added.
The side panels are pretty rigid, but they’re not enough on their own. In previous projects I’ve relied more on pressure fitting M5 screws, creating holes that are just 4.8MM wide. This works for 2,3, or 4 times of screwing into the holes, but they wear out- and it’s easy to strip the plastic threads and risking sending the part to the recycle bin. This time I used threaded inserts - the specific one is at the bottom of this article from Amazon. These are pretty thin walled inserts- and I simply put them on the end of my hot soldering iron and pressed them into the plastic. I had to work fast though, the soldering iron could get hot enough to start to melt the inserts. I ended up only losing one insert this way, the others went in fine. I simply got the insert hot, pressed a little, then used a hex driver to thread them in until they were flush with the plastic. I used flush cutters to trim off any excess plastic. Make sure to do this in a well ventilated area with a respirator!
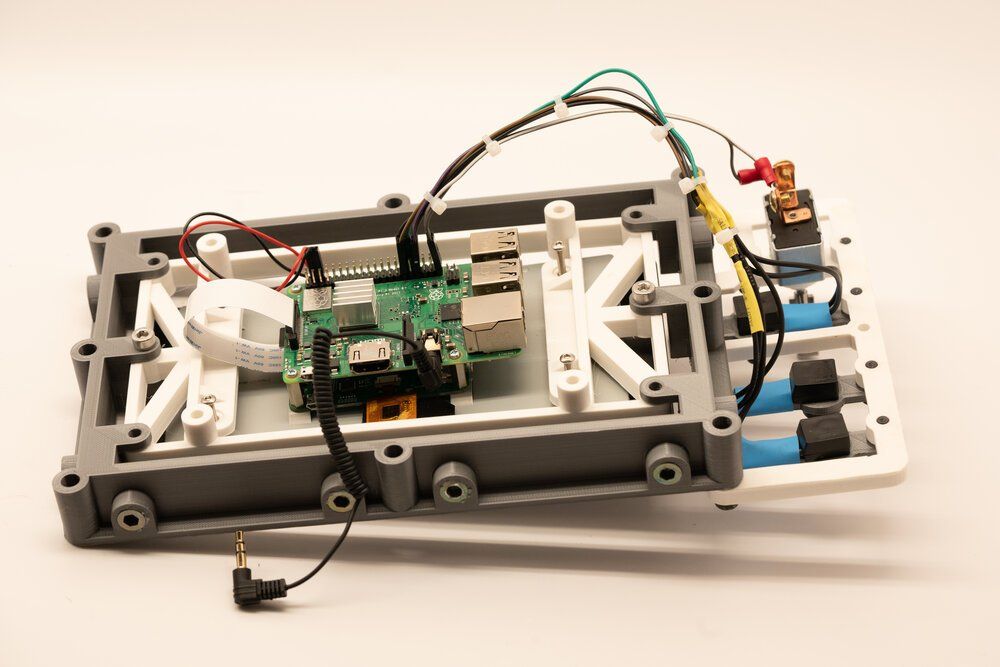
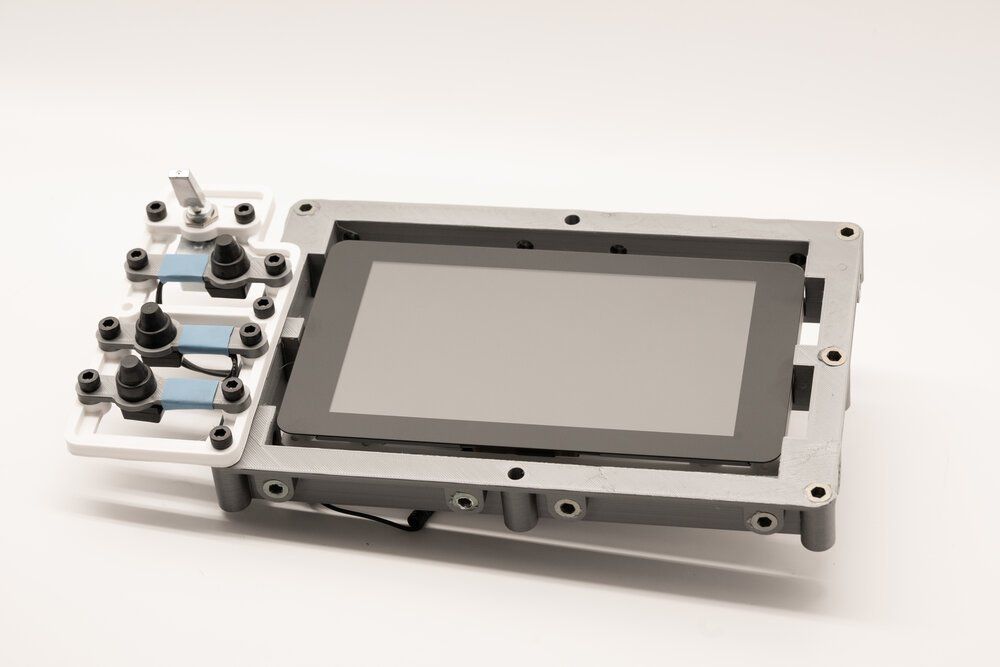
With the frame assembled, I set about attaching the electronics. You can see the white plastic frame attached to the back of the Raspberry Pi 7” touchscreen, that’s the exact same design as the one I used on my Raspberry Pi Recovery Kit, my last cyberdeck project. You can see the switches are wired up too- you can wire them up however you want, but I used some simple hookup wire and some jumpers soldered together, and then wired each switch up- one lead goes to a GPIO pin of my choice, the other to ground. This lets me read the GPIO pin status, essentially reading if a switch is on or off.
You can also see the coiled audio patch cable, that comes into play a bit later. Below you can see the panel from the front, looking very cyberpunk if I do say so. My inspiration here was the Matrix, going back and watching I could see some cool elements- but the set designers didn’t think of 3D printers, and this is what a display could look like onboard one of the human ships.
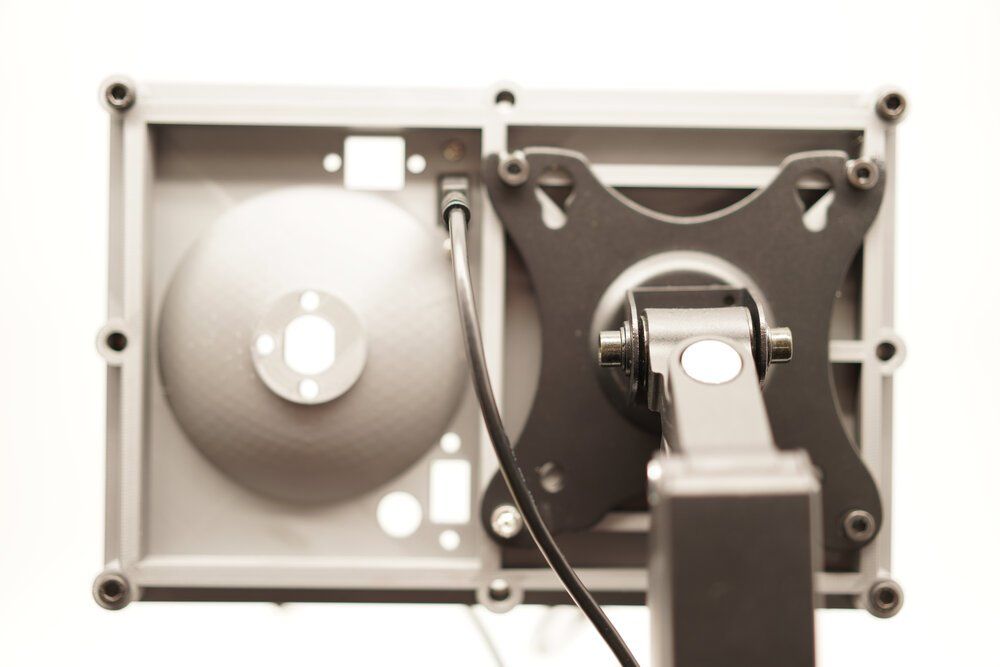
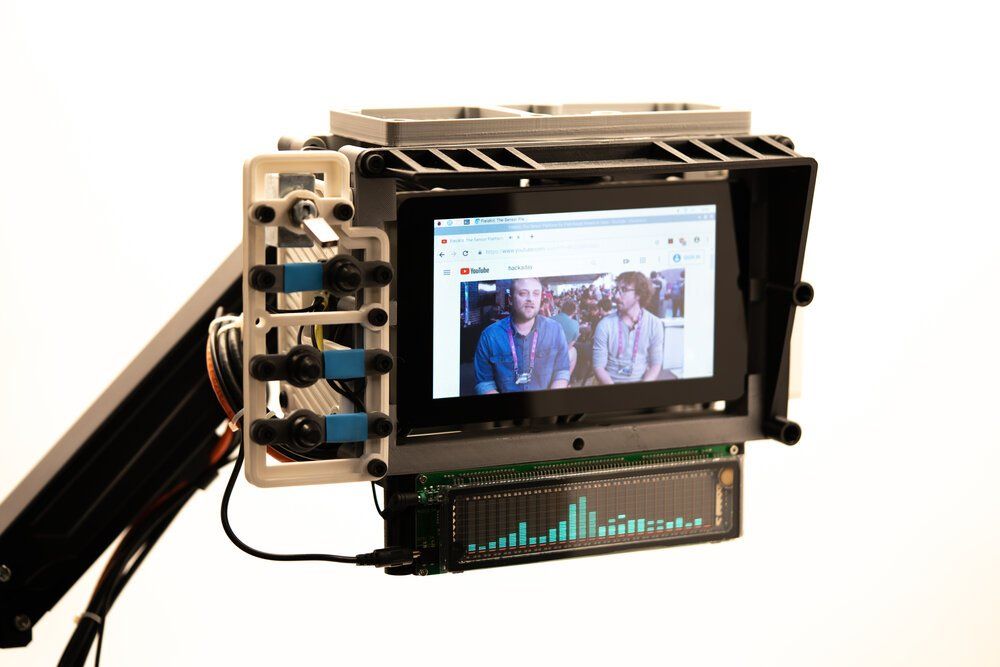
The back carries over some of the same ideas, with a frame using threaded inserts. I’ve left it out of the photos because it’s just not a very interesting part- but you can see the pack panel attached here. I added some touches like the dome, but didn’t end up using it. I did have several cutouts for Adafruit panel connectors, which work well here. You can see the monitor arm attached here as well, using the same M5 screws.
Be sure to click through the gallery below to see a ton of other photos too.
Parts & Materials List
Still reading? Cool! Here’s the list of tools and parts used to create this project:
Tools
- Weller Soldering Iron for soldering wires and heating the inserts (Amazon Link)
- DeWalt Electric Screwdriver - Trust me, you don’t want to assemble this by hand (Home Depot Link)
- Flush Cutters for trimming plastic (Amazon Link)
- Hex Driver for screwing in hot threaded inserts (Amazon Link)
- Hair Dryer for the heat shrink tubing (Any hair dryer or heat gun should do)
Design Files & Prints
3D Design files for downloading and printing yourself (Github)
- Original ones in the photos of this article are here
- Parts designed for minimal plastic use are here
- Experimental versions are here
3D Printed parts for purchase on my store here if you don’t have a printer (Back7 Store). Each color below uses the using the optimized version of the project unless otherwise stated.
- Grey Kit
- Black Kit
- White Kit
- Minimalist Kit (open frame variant) with random mixed colors of black, white, orange, purple, etc.
- Parts are also on Tinkercad here and here if you want to modify them, but make sure to check Github for regular updates, that is where models will be actively maintained.
Materials
- Any filaments will work fine here, but I used what I had lying around, here’s what I used. White PETG Filament (Amazon Link), Space Grey Filament (Amazon Link), Black Filament (Amazon Link)
- Monitor Arm (Amazon Link)
- Raspberry Pi - any of the newer form factor will do, I am using a Pi 3B+ (Amazon Link)
- Raspberry Pi 7” Touchscreen (Amazon Link)
- Toggle Switch (Amazon Link)
- Pushbutton Switches (Amazon Link)
- Black Oxide M5 Socket Head Screws (M5x8mm Amazon Link. M5x12mm Amazon Link)
- VFD Graph Display (Amazon Link)
- Audio Patch Cable (Amazon Link)
- Panel Mount Ethernet (Adafruit)
- Panel Mount USB (Adafruit)
- USB Extension Cable (Amazon Link)
- HDMI Cable (Amazon Link)
- M5 Threaded Inserts (Amazon Link)

Comments ()